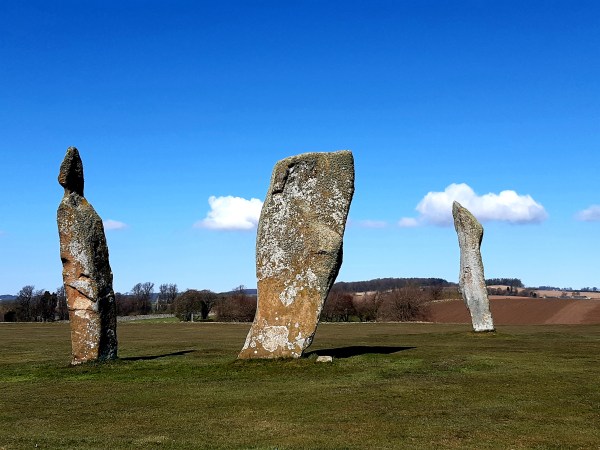
Where once where there were four, now there remains three very impressive, irregularly shaped, red sandstone megaliths. They are thought to have originally been part of the 16M circumference of a complete stone circle from the bronze age, 2000 – 1500BC. It’s said that the missing fourth stone had been broken by treasure hunters, the base remaining with the broken upper lying nearby until 1792. It was then moved by a farmer to allow for better ploughing of the field and was subsequently lost to memory.
A stone lined grave (cist) containing a skull was discovered near the Lundin stones in 1844. The skull, was given to Prof of Anatomy at Edinburgh University, Sir William Turner, who reported it had a metal arrowhead imbedded within a fracture but this crumbled to rust when it was touched. The discovery of the ‘ancient sepulchre’ draws parallels with other standing stone sites in Fife where human remains were also found.
Local folklore tells that the Lundin stones were memorials to Danish Chiefs who had been slain during a great battle here. However, these days the stones are witness to nothing more belligerent than golfing competitions as they present a magnificent feature on the second fairway of Lundin Links Ladies Golf Course.
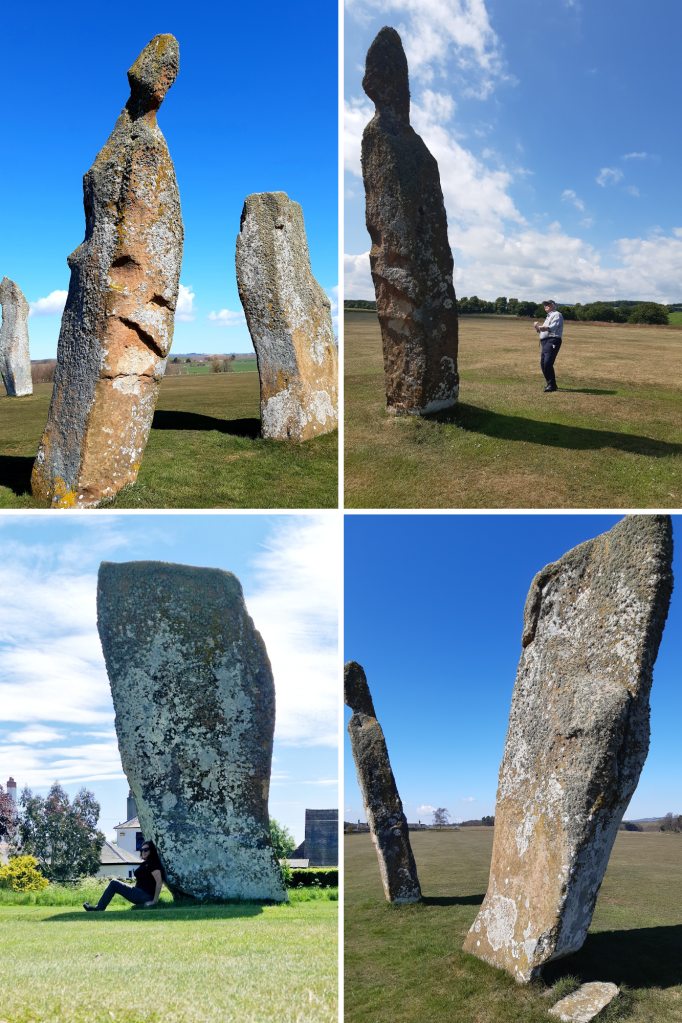
The stone sitting south east, has a height of 4.2M with a slight northward incline. This one is heavily weathered, pitted with a large crack that has developed on its east side. The south stone is 4.6M in height and decidedly inclined southward. Lastly, the north stone is the tallest at 5.1M, having a slight incline westward. Bear in mind that in order for these stones to remain standing they will need be seated into the ground to equivalent lengths
I’ve come here many times with family or friends who’ve had an interest in Scotland’s ancient history and they’ve all been impressed with the magnitude of the Lundin Stones and the fact that they still remain after all this time. If you decide to visit, please be polite by asking at the Club House if it’s safe to walk to the stones as there may be golfers about to tee off. Be sure to also skirt the course on your way to and from the site. A blow to the head with a golf ball could mean your skull might be the next to leave here with a fracture!
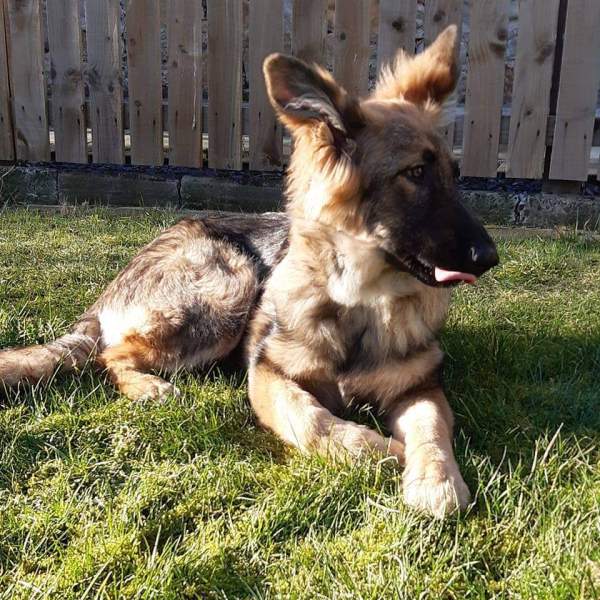
My car was becoming much too cramped for a rapidly growing Millie so I decided that a van would be the perfect alternative, not just for Millie, but something that I’d always wanted and better suited for my outdoor activities. I looked at several vans and settled on a Renault Trafic then got to work adapting it to suit. My Dad was 91 at the time and as a retired carpenter, relished having a new project to get his hands on, albeit at a much slower pace in keeping with his age and hampered mobility.
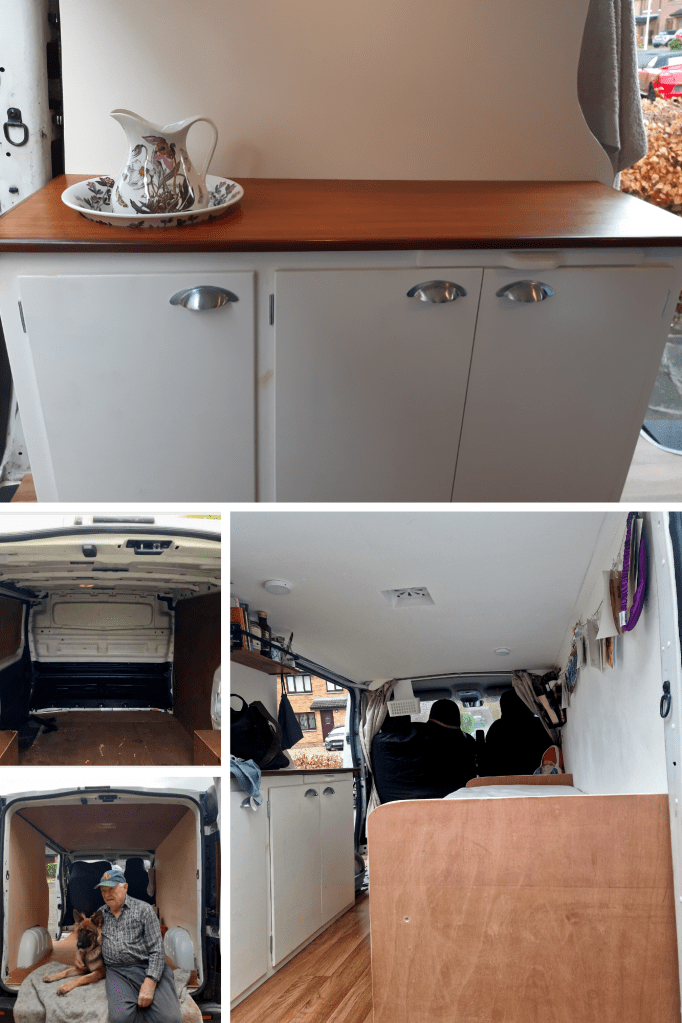
1st steps – after removing the bulkhead and ripping out the filthy and broken 5mm plywood lining, I gave the van a thorough cleaning. As ventilation is paramount, fitting an air vent was the first item to be addressed. I have to say, it was probably the most stressful part of the whole exercise. Cutting a hole in a perfectly good, solid roof was nerve-wracking and absolutely had to be done right first time. After much ‘debate’ and a wee bit of swearing about measurements my Dad and I settled on drilling numerous small holes around the circumference of the area to be removed. Fortunately, the perforated area popped out easily with a quick thump from a hammer. A heavy duty file and the sander removed and smoothed the rough edges then the area was primed with rustproof paint. The vent fitted perfectly, was screwed into place and the rim, inside & out sealed with silicone to make it watertight.
Insulation – I fitted sound deadening mats which were stuck to all flat areas around the interior to reduce vibration and noise. Then, all the cavities, recesses on the walls and ceiling were filled with loft insulation, the whole lot covered over with insulating foil and fastened into place with foil tape. Ridges on the floor were filled with strips of insulating bubble foil then covered over with radiator reflective foil. (I found that using carpet adhesive spray to hold everything in place as you work, keeps all in situ as you go along).
Strapping and fitting the new ply lining – The ply flooring went down first (10mm thick, cut to shape plywood, using self tapping screws – countersunk). Then, as luck would have it my brother arrived from NZ, got his sleeves rolled up and with my Dad, set about installing the strapping for fixing the plywood lining to the inside of the van. The strapping is made up of cut to size, 40mm x 20mm battens. Using truss head, self tapping screws for better hold, 5mm ply for the ceiling was fitted into place. Lastly the walls went in (10mm cut to shape ply, fastened with countersunk self tapping screws) also acting as additional support for the ceiling. Once checked to ensure they were tight, all countersunk screws were covered over with wood filler then sanded for a good finish.
Flooring – PVA glue was painted all over the floor to seal the wood, then once dry, flock-backed vinyl flooring was cut and fitted using, again, carpet adhesive spray.
The Fixtures – my Dad made a 1950’s style mini kitchen unit using leftover wood from the battens for its frame and plywood off-cuts for the facing. It has inner shelving so affords plenty of space to store groceries, cooking equipment , utensils, plates & mugs, etc. There’s also a pull-out chopping board. The counter top of the unit had been the top of my Great Aunt’s teak dressing table which I’d been storing in my loft for a very long time and in reality, was a piece of furniture I was never going to use. I think it looks superb and I hope she wouldn’t have minded. A circular hole was cut in the left end of the counter top which my Portmerion bowl and ewer fits into nicely. The pull out sofa bed, I made using battens and 10mm x 70mm cut to length wood for the interlocking slats. The bed ends were done with more plywood. There’s ample space underneath the bed for storage where I use laundry baskets for some sort of semblance. A double foam mattress was cut to size (I found that a serrated bread knife worked best for this job) and I used 2 x king size mattress protectors as covering for the pieces needed. The bed is super comfortable, by the way!
Electrics – I studied several tutorial videos with the intention of installing leisure batteries. While I’m confident in my woodworking abilities, I cannot say the same when it comes to anything to do with electricity. In the end I shelved the idea of fitting leisure batteries and went with a much more simple option. My lighting, magnetic touch lights, is rechargeable and this can be done from the van’s 12V socket. To be honest that’s all that’s required. I have a rechargeable lamp which is only ever used as back-up and I cook with a portable gas stove. I did invest in a portable power station, however, it’s only required if I need to use my hairdryer, to perhaps recharge my in-car DVD player or charge up my mobile phone if I’ve forgotten to plug it into the 12V socket while driving. For me, keeping it simple works best.
Other Items – The most useful item I purchased was a Porta Potti. Not having to desperately find a place ‘to go’ or not having to trudge to campsite toilets during the night (especially if it’s raining) is nothing short of bliss. If you have space for it, definitely buy one. A rechargeable camping shower was a gift from my Son, so if I haven’t been for a cold water swim or need to wash my hair, then it’s certainly a great little item.
Reading this back, it all sounds so incredibly straight forward. However, if you’re going to modify your own van, bear in mind there are always going to be challenges in a project like this so be sure to plan everything out and take your time, especially in making sure your measurements are correct. Mistakes can be costly.
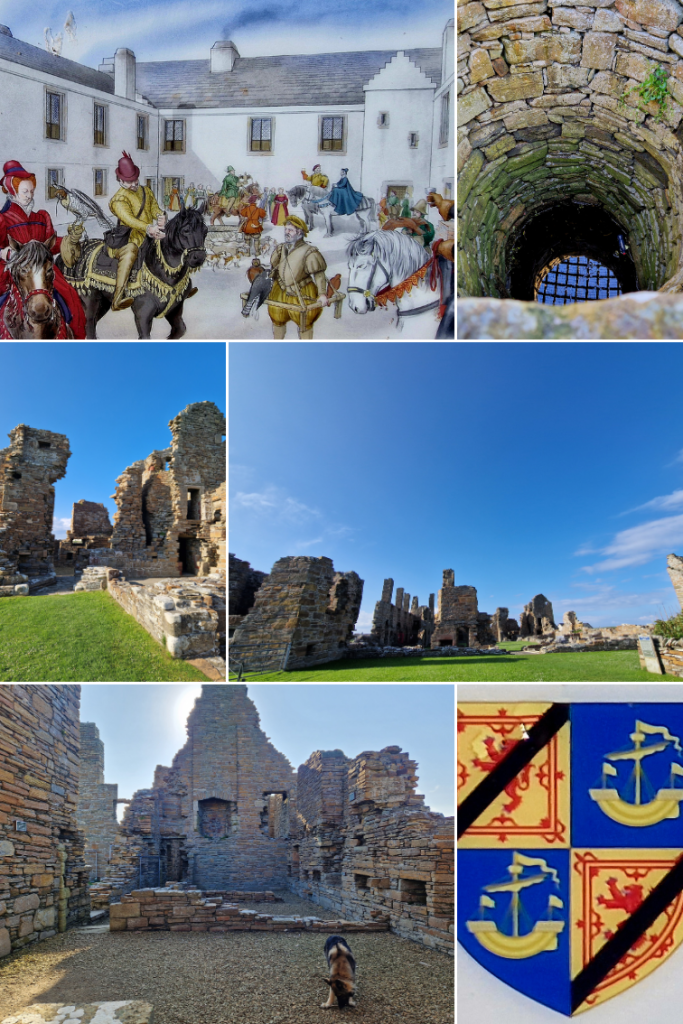
The Palace was built in the 1570’s – 1580’s for the notorious Earl Robert Steward, half brother of Mary Queen of Scots. Mary had 13 siblings and Robert was an illegitimate son of King James V and noblewoman Euphimia Elphinstone. After Mary’s forced abdication, Robert remained in the good graces of her son, the young James VI so that in 1581, he was elevated to Earl (Sheriff) of Orkney. Robert considered himself absolute ruler of Orkney and Shetland and this Renaissance style palace was a bold statement of his wealth and power. An inscription in Latin above the palace’s main entrance read – ‘Lord Robert Stewart, son of King James V, King of Scots, commissioned this building’. While Robert clung to his Royal connection, his coat of arms required the Scottish Royal Arms to bear a ribbon through the middle, a symbol of his illegitimacy, while the 2nd and 3rd quarters show the arms of the Earldom of Orkney.
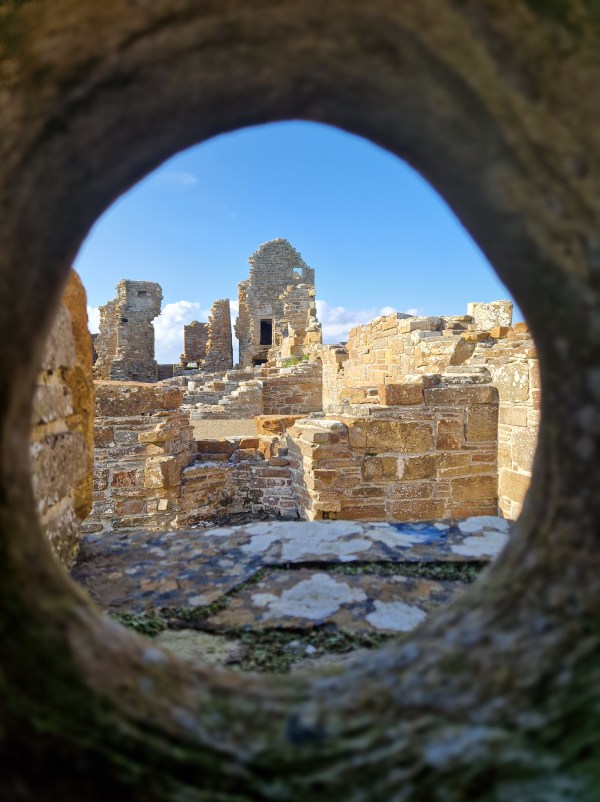
Despite being a luxurious home, defence was still a major consideration. The palace was built around three sides of a courtyard with projecting towers at 3 of its 4 corners and a wall enclosing the north side. There were entrances to the south and west. To mitigate any security risk, only the upper floors had large windows while the ground floors had small openings and an array of gun loops from which artillerymen could cover every side of the building. Despite the many gun holes, the palace was still a place of grandeur and elegance. A single long gallery with views out to sea ran along the west wing and the building had fine panelling and painted ceilings in all the rooms that were needed to keep the Earl living in style. There were kitchens, a ‘girnel’ (granary), brewhouse and ample cellars for supplies. The palace was also equipped for sport and exercise, having archery butts, and a bowling green.
Earl Robert died in 1593 and his son Patrick succeeded him to also become Earl. Patrick was known as ‘Black Patie’ with a reputation for violence and a taste for luxury he couldn’t afford. In 1609 Patrick was imprisoned for ‘monyfauld wrongis’, including theft of lands and funds, oppression of local people, kidnapping, torture and murder. While incarcerated in Dumbarton, Patrick orchestrated a rising in Orkney however it failed and he was summarily beheaded for treason. By the time the Palace was taken over for use by Cromwell’s troops in 1653, most traces of Earl Robert’s extravagant lifestyle were gone and the kitchen contained ‘nothing, but mukk and filth!’ Thereafter the palace was used occasionally by later earls of Orkney but by 1700 it had fallen into decay.
It was such a beautiful, sunny day when we visited and although now in ruin, the palace still exudes an air of its previous magnificence. Definitely worth taking the time stop by.
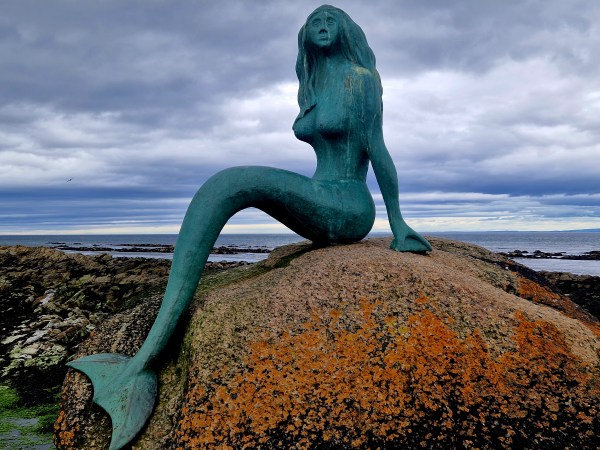
Capturing the imaginations of those who visit her, the alluring Mermaid of the North perches on ‘Clach Dubh’ (Black Rock) by the village of Balintore, Easter Ross. Coastal fables tell of a Mermaid who was captured by a cunning fisherman who hid her tail. Years later, after bearing his children, she found her tail and escaped back to sea, returning regularly to the shore, bringing fish for her hungry family.
Donal had left his boat to gather gulls’ eggs, up high on the cliff, when he noticed a beautiful, long haired woman sitting, singing on a rock below. He crept down for a closer look and upon realising she was a mermaid, grasped hold of her left hand, which it was said was the way to capture a mermaid as all of her strength is in her right hand. She begged him to let her go but being a lonely bachelor, he hid her tail so she couldn’t return to the sea and resolved to make her his wife. The Mermaid gradually settled into life with Donal, had several children with him and made a life for herself, caring for her family. One day though, while she was clearing away some dusty old things in the loft, she came upon her tail. She held it close and hurriedly ran back to the sea lest anyone stop her. Donal would often row out to sea, calling her, begging her to come home but she never returned to him. Everyday, however, her children would visit the shore where she would bring them fish to take home.
Millie & I always stop by, sometimes bringing friends, to visit The Mermaid of the North on our trips around the North Coast. She sits on her rock against the dramatic backdrop of the Moray Firth, where there are superb views of the coastline.